WordPress pages are easy to edit, as long as you stick to built-in features. But at NewCity, most sites we build require flexible templates without breaking carefully-planned visual design and information architecture.
For that reason, the first plugin we install for every WordPress project is Advanced Custom Fields (ACF) Pro. ACF is widely used by WordPress developers for its many useful features. For any given problem, ACF offers multiple solutions. Choosing the best possible solution can be challenging, even with years of experience. NewCity has found the following technique to be a user-friendly, consistent, and future-proof solution for adding flexible page content.
What you’ll need
Advanced Custom Fields ProNote: There is a free version of ACF available in the WordPress Plugins Directory, but you’ll need the Pro version because it includes the “Flexible Content” field.
Advanced Custom Fields Extended
This third-party, open source plugin takes ACF from “very powerful” to “ridiculously powerful.” Documentation is a bit spotty, and the options may seem overwhelming. But that’s what this tutorial is for!
Classic Editor
WordPress’ default editor for pages and posts is the Block Editor, also called “Gutenberg.” Classic Editor restores the “classic” WYSIWYG editor / sidebar interface. This works better with the type of field groups we will be using.
acf-autosize
This plugin does just one thing: shrinks WYSIWYG fields in ACF field groups.
PHP / WordPress template building knowledge
We’ll assume that you are building a WordPress theme for this exercise, but you can also adapt the code for use in a custom plugin.
What we are trying to build
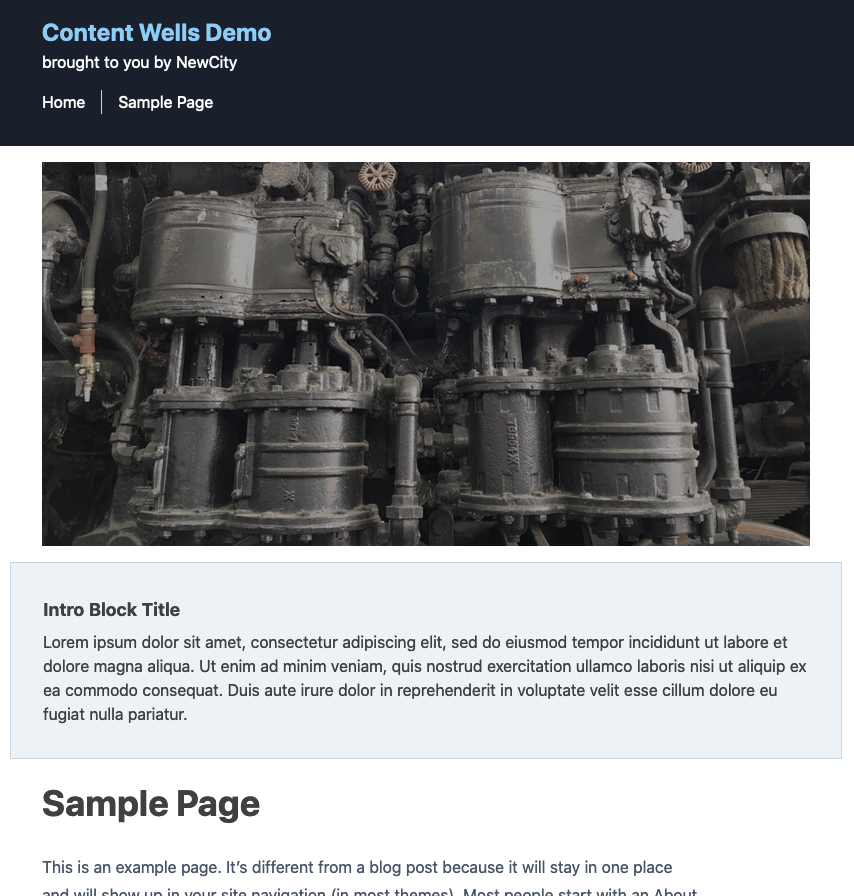
Let’s start with a very basic WordPress page and add two optional components above the main content: a large “cover image” and an “intro block” with a title and body text.
When finished, a fully populated page will look like this:
The layout and styling of components will not be covered here, but we styled this page using TailwindCSS. You will see some Tailwind classes in the demo code.
To keep it simple, we’re using the default “Sample Page” that is auto-generated when you install WordPress.
The “normal” ACF way
The most straightforward way to create new ACF fields is to add them directly to a field group and assign that field group to the “Page” post type.
Wrapping the Intro Block title and body fields in a “Group” field keeps things nicely namespaced and saves a call to the get_field() function.
The resulting page edit screen looks like this:
The code to display the fields on the front-end will look something like this. The second argument for wp_get_attachment_image() should be an image size supported by your theme. Ours is 'cover_image'.:
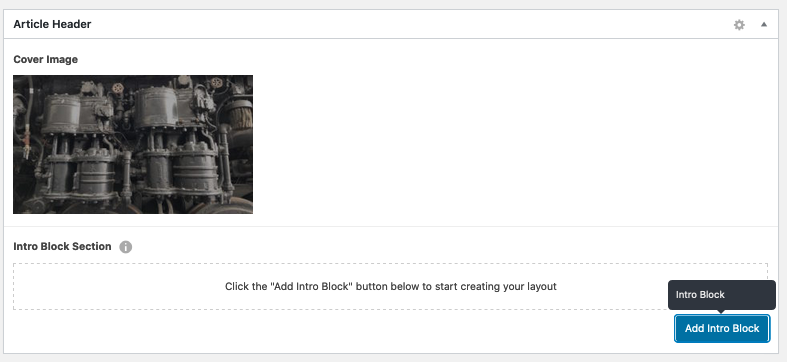
What we have now is functional, but the fields take up a lot of space. Editors will have to scroll past these optional sections to get to the main content area, even if they aren’t being used. Let’s do two things to make the layout more compact.
First, install and activate the acf-autosize plugin. This will collapse all empty ACF WYSIWYG fields’ heights down to a couple of rows. As more content is added , they will expand. You’ll gain a nice amount of vertical screen real estate.
Second, wrap the Intro Block in a Flexible Content field instead of a simple group. This will change it into a much more compact field that remains empty until the editor selects “Add Intro Block” and then “Intro Block.”
This requires a small modification to your PHP code:
<!--?php endif; if (is_array($intro_block_section)): foreach($intro_block_section as $intro_block): ?-->
The new code loops through and displays each layout in the flexible content field. We set the maximum number of layouts to “1”, so the loop will output either no intro blocks or exactly one intro block.’
Improving the add button
While this new edit screen is nicer, it’s not perfect. Why should a person have to manually select “Inline Block” as the layout type when it is the only possible option? Also, the “Add” button is all the way to the right and doesn’t quite fit in with the rest of the interface.
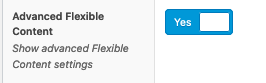
ACF Extended is the perfect tool to improve the user experience. With this plugin activated, go into the Flexible Content field editor and turn on the “Advanced Flexible Content” toggle switch.
More than a dozen new options become available for this field. Turn on the “Stylized Button” toggle.
Not only does this change the appearance of the field to a dashed rectangle with an “Add” button in the middle ( sometimes called a “content well”), it gives ACF Extended permission to auto-select the “Intro Block” layout because it is the only layout available.
Turn it off! Wait, turn it back on!
At the moment, the only way to remove the Intro Block is to delete the layout, which permanently deletes its content as well. One feature we like in our field groups is the ability to turn page sections off and on while preserving their content. This is useful while trying out different page layouts, or when information needs to be displayed periodically.
In the past, we would solve this by adding a separate “True/False” field, then checking for that field’s value in the PHP template before displaying the page section.
ACFExtended offers a more elegant solution — the “Layouts: Toggle” option. This adds a small “Toggle layout” button to the top of each layout in the flexible content field. When the toggle is off, the layout is grayed out, and it is not returned as part of the flexible content array when accessed by get_field(). Your foreach() loop will have zero items to process.
Advanced: Locking it down
But… maybe preserving vertical space isn’t our highest priority. Maybe you want to encourage editors to always use the Intro Block by having its fields visible by default — without giving up the advanced Flexible Content settings.
This is trickier because it requires ACF to add an empty Info Block layout to the flexible content field if it doesn’t already have one. Neither ACF nor ACF Extended have built-in settings for choosing a default layout, so we have to write custom code. This can go into your theme’s functions.php file, or in any file that is loaded before ACF runs its 'acf/load_value' action.
/** * Automatically add one `intro_block` item to empty * flexible content fields named `intro_block_section` */ add_filter('acf/load_value/name=intro_block_section', 'acf_auto_intro_block', 20, 3); function acf_auto_intro_block($value, $post_id, $field) {if ($value === "") {$value = array(['acf_fc_layout' => 'intro_block'] ); }
return $value;
}
This function example will only work for flexible content fields with a very specific field name (in this case,intro_block_section), so you must make the name of your field unique across the entire site.
Since we only want to allow one Intro Block, there is no reason editors need to know that it is a flexible content field at all. By using the ACF Extended options “Hide: Add layout button” and “Hide: Delete layout button”, we can hide the unnecessary interface clutter that might confuse editors.
What if the client comes back and requests the ability to add multiple Intro Blocks instead of just one? With this strategy, it is easy to add support for multiple layouts. Just enable the Add and Delete buttons and remove the maximum layouts limit. You won’t even have to modify any PHP code!
You can take it from here!
This is just the start of the possibilities with advanced Flexible Content options in ACF Extended. Build complex fields, add relationships between fields and posts, or even nest flexible content — inside other flexible content! Now that you’ve put everything inside of flexible content layouts, you can use Dynamic Layout Previews, to let users preview the finished component as they edit it, similar to what Gutenberg does for blocks.
If you come up with a new way to improve the WordPress page editing experience using ACF, let us know by hitting us up on Twitter or Facebook!


 The layout and styling of components will not be covered here, but we styled this page using TailwindCSS. You will see some Tailwind classes in the demo code.
To keep it simple, we’re using the default “Sample Page” that is auto-generated when you install WordPress.
The layout and styling of components will not be covered here, but we styled this page using TailwindCSS. You will see some Tailwind classes in the demo code.
To keep it simple, we’re using the default “Sample Page” that is auto-generated when you install WordPress.
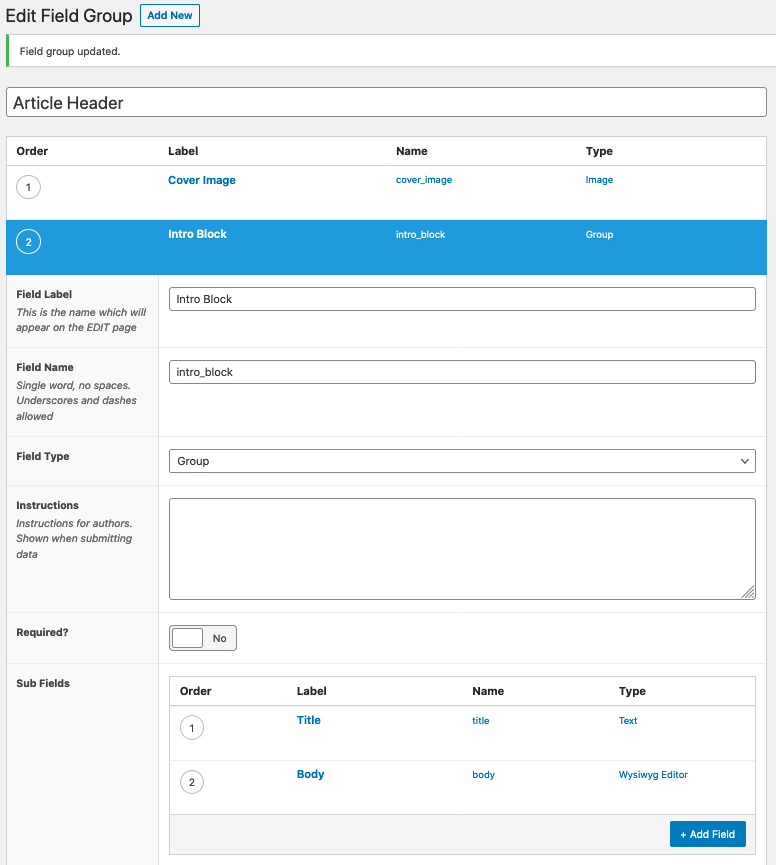 Wrapping the Intro Block title and body fields in a “Group” field keeps things nicely namespaced and saves a call to the
  The code to display the fields on the front-end will look something like this. The second argument for
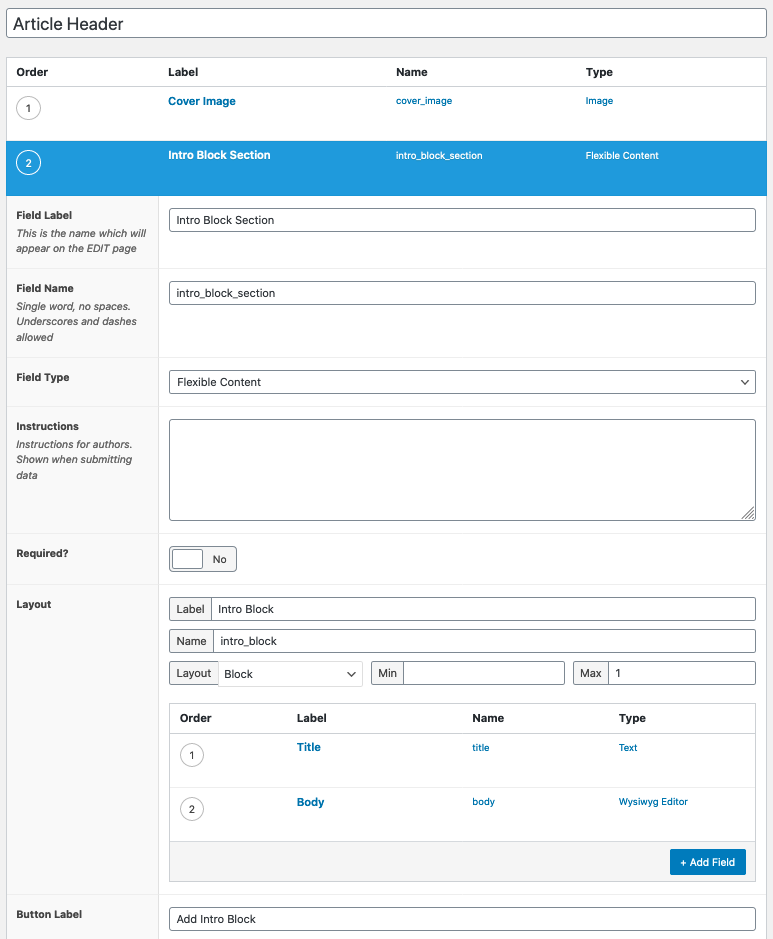
 This requires a small modification to your PHP code:
 More than a dozen new options become available for this field. Turn on the “Stylized Button” toggle.
 Not only does this change the appearance of the field to a dashed rectangle with an “Add” button in the middle ( sometimes called a “content well”), it gives ACF Extended permission to auto-select the “Intro Block” layout because it is the only layout available.